Garage Door Installation Step by Step: The Process Pros Actually Follow | Eco Glass Windows & Doors
Garage Doors • Replacement Guide • Vaughan

Garage Door Installation Step by Step: The Process Pros Actually Follow

By Eco Glass Windows & Doors ⏱ 7 min read Primary Vaughan Safety-first workflow
Important safety note: A garage door is heavy and the spring system is under extreme tension. This guide explains the professional workflow so you understand what’s involved, but spring work should be performed by trained professionals using the correct tools and manufacturer specifications. If you’re not completely confident, stop and call a pro.
Complete guide for garage door replacement — save to read our blog later.
📌 Save for later

If you’ve ever watched a garage door install and thought “it’s just tracks and panels,” you’re not wrong — until you get to the springs. A complete garage door replacement is really two jobs: a safe teardown of the old system (done in reverse order), then a precise rebuild where every hinge, roller, track, and bracket lines up smoothly. In this guide we lay out the same manufacturer-style sequence pros follow: opening prep, hardware staging, panels + vertical tracks, horizontal tracks + hangers, then the torsion system and cables (pro-only). You’ll also see the finishing detail most “average” installs skip: color‑matched aluminum capping so the opening looks like a full frame replacement. Keep reading for the full step-by-step workflow.

After garage door replacement: modern dark brown garage door with color-matched aluminum capping, exterior view.
Finished result: a clean install plus color‑matched capping for a “full frame replacement” look.

Install order (simplified)

Most manufacturer manuals follow this sequence to keep everything square and balanced.

  1. Prep opening and clearances
  2. Stage panels and hardware
  3. Bottom panel + vertical tracks
  4. Horizontal tracks + hangers
  5. Spring system + cables (pro-only)
  6. Alignment + balance checks
  7. Finishing/sealing + optional capping

Removal order (reverse)

Demolition is done in reverse because the spring + cables must be made safe first.

  1. Secure door + disconnect opener
  2. De-tension springs (pro-only)
  3. Remove cables, drums, torsion components
  4. Remove horizontal tracks/hangers
  5. Remove door sections (typically top-down)
  6. Remove vertical tracks + remaining hardware

Want it installed safely (especially the springs) and finished cleanly with color‑matched aluminum capping? Eco Glass Windows & Doors handles full garage door replacement in Vaughan and surrounding areas.

Replacement overview

A complete replacement is a two-part job: remove the old system, then install the new system. The installation sequence below follows a typical manufacturer-style order (opening → panels → tracks → spring system). Removal/demolition happens in the opposite order, because the spring and cables must be made safe first. Considering an upgrade? See all our garage door options.

Before garage door replacement: older tan garage door with windows, exterior view.
Before: existing door (exterior).
After garage door replacement: new dark brown garage door with clean capped frame, exterior view.
After: upgraded door + capped frame finish.
Before replacement: interior garage view facing the old garage door and track layout.
Interior “before” view of the original setup.

PPE & safety gear (non-negotiable)

Before anything starts, use appropriate PPE, safety gear, and the specialized tools professional installers use—especially around springs and cables.

Safety gear (non‑negotiable)

  • Safety glasses (mandatory)
  • Cut‑resistant gloves
  • Hard hat (recommended)
  • Closed‑toe boots
  • Hearing protection (if using impact tools)
  • A helper (do not attempt solo)
Optional: typical tool/material list (varies by door)

Tools and parts vary by door model and spring system. A typical install may require clamps/locking pliers, levels, socket set, drill/driver, ladder, measuring tools, track hanger materials, and proper winding bars for torsion systems (professional-only).

Professional installers handling torsion system components with safety gear and ladders.
Spring work is pro-only: extreme tension + specialized tools + manufacturer specs.

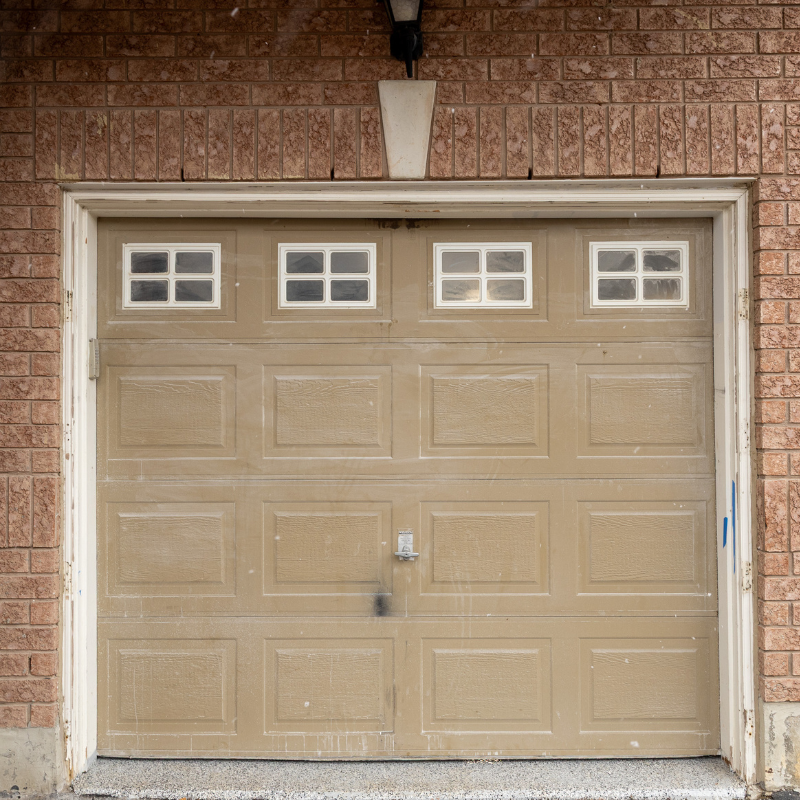
Demolition/removal (reverse order)

A safe replacement starts with a controlled teardown. Because springs and cables hold the door’s counterbalance, removal is done in reverse order. Professionals secure the door first, then make the spring system safe, then remove tracks and door sections.

Pro-only: de-tensioning and removing torsion/extension springs is the highest-risk stage. Do not attempt without training and proper tools.

How pros safely de-tension the torsion spring

Before a single track bolt is touched, the spring tension must be fully released. The door is clamped to the track so it cannot move and the opener is disconnected. Pros then insert solid steel winding bars into the holes on the winding cone — never screwdrivers or rebar.

Gloved hand supporting the torsion shaft end bearing plate during spring hardware removal.
End bearing plate and cable drum secured before any spring hardware is touched.
Controlled torsion spring unwind using winding bars at the winding cone (pro-only).
Winding bars inserted at the cone — tension released in slow, controlled quarter-turn steps.
Professional using two winding bars to de-tension a torsion spring on a garage door shaft.
Two winding bars in the cone — the correct and only safe technique.

With a bar holding the tension, set screws are loosened and the spring is unwound in slow quarter-turn increments — a typical door requires 30+ steps to fully release. The bar is never let go while tension remains; a spring that slips can send a metal bar flying at dangerous speed.

Once fully de-tensioned, the cable drums, torsion shaft, and spring assembly are removed overhead. Only then are tracks and door sections safe to take down. This is the exact opposite sequence of installation — the spring comes off last during install and first during removal.

Installer carrying an old garage door section out of the garage during demolition.
Demolition: old door sections are removed safely once the system is made safe.
Two installers working during garage door removal inside the garage.
Teardown continues: old sections and remaining hardware are removed to clear the opening.
Removing the old vertical track fastener with an impact driver during demolition.
Old vertical tracks unbolted and removed — the opening is now clear for the new system.
1

Get the opening ready

Installation starts with the opening. The goal is to ensure the opening is correct for the door size and that framing conditions won’t force the tracks out of alignment.

What professionals check

  • Opening width/height match the door size
  • Header plane is flush with the back jambs
  • Jambs are plumb and the opening is square
  • Headroom + rear clearance are sufficient for the chosen track radius and opener (if used)
  • Floor is evaluated for slope (affects bottom seal contact)
Installer checking alignment with a long level during garage door replacement.
Quality starts here: checking level/plumb before final track placement.
2

Stage panels & hardware

Even when door kits don’t include perfect manuals, the workflow is standardized: lay out the panels in order, sort hardware by type, and confirm left/right parts. (Left/right orientation is always from the inside looking out.)

Pro staging tips

  • Separate left/right components (tracks, bottom brackets, cable drums for torsion setups)
  • Keep hinges in order (many are numbered by section position)
  • Pre-check that you have all fasteners, brackets, rollers, and track supports
  • Plan your “hardware corner” so install stays organized
Garage door hardware and components staged before installation.
Staging keeps the install efficient: tracks, hinges, rollers, brackets, fasteners.
3

Install panels + vertical tracks

Most sectional doors install from the bottom up. Pros center and level the bottom section first, then install vertical tracks with consistent spacing, then stack and hinge sections upward. Every panel is brought in, orientated correctly, and staged before it’s lifted into position.

Positioning the bottom section and bottom bracket at the floor threshold.
Bottom section placed and bracket set at the threshold — everything is built on this first placement.
New dark brown garage door panels staged at the opening ready for installation.
New sections staged at the opening — having a helper and a clear workflow keeps the install moving.
Installer positioning the bottom panel of a new garage door at the opening.
Bottom section placement sets the foundation for the entire door.
Close-up of bottom roller and bracket assembly near the garage floor.
Detail: bottom bracket/roller area (critical connection zone).
Technician fastening a garage door track bracket near the bottom of the opening with an impact driver.
Vertical tracks are set plumb with consistent spacing.
Multiple garage door sections stacked and aligned in the opening during installation.
Progress view: sections stacked and aligned before final tightening.

Lifting sections and installing hinges

Each section is lifted into the opening with a helper, seated into the tracks, and immediately hinged to the section below. Hinge numbers correspond to their position — using the wrong hinge on the wrong row causes binding. Hardware is snugged but not fully torqued until all sections are in place and the door sits square.

Two installers lifting a new garage door section into the opening.
Each panel takes two people — one guides the rollers into the track while the other supports the weight.
Installing a side hinge and roller bracket on a garage door section.
Hinge and roller bracket installed immediately after each section is seated — position matters.
Impact driver fastening hinge and roller bracket hardware on a garage door section.
Hinge hardware torqued to spec — loose hinges cause noise and uneven travel.
Two installers securing a hinge and roller bracket on the door section together.
A second pair of hands keeps sections square while hardware is tightened.

Alignment reminder: Vertical tracks must remain parallel and level relative to each other. Small errors here turn into binding and noise later.

4

Install horizontal tracks + hangers

After the vertical tracks and sections are in place, the curved radius and horizontal tracks are installed. Rear hangers/supports are then added to keep the horizontal tracks stable and correctly spaced.

What pros verify

  • Horizontal tracks are aligned and securely supported
  • Spacing between tracks stays consistent
  • Tracks have the proper slope (manufacturer-specific)
Installers positioning the curved radius track section during a new garage door installation.
Installing the curved radius section (vertical-to-horizontal transition).
5

Torsion spring system + cables pro-only

The torsion system counterbalances the full weight of the door. Correct sizing, correct assembly, correct cable routing, and correct spring adjustment are what make the door feel light and operate smoothly.

Pro-only: spring tensioning/adjustment is extremely dangerous. It must be done to the manufacturer’s specifications using the correct winding bars and safety procedures. Do not attempt this stage without training.

Assembling and mounting the new torsion system

The new torsion system is assembled as a complete unit on the ground first — shaft, drums, bearing plates, and spring — then lifted into position above the door. Everything is aligned and fastened before any winding begins.

Torsion shaft with cable drum and bearing plate assembled before installation.
Torsion components assembled as a unit on the ground before being lifted into position.
Center torsion spring and bearing plate setup (pro-only).
Center bearing plate and spring seated — alignment here is critical before any tension is added.

Winding the spring — the reverse of de-tensioning

Once the system is mounted and cables are seated on the drums, the spring is wound to the correct number of turns for the door’s weight. This is the exact reverse of the de-tensioning process done during demolition — the same winding bars, the same quarter-turn discipline, just building tension instead of releasing it. The number of turns is calculated from the door weight and spring specifications, not guessed.

Technician winding the torsion spring with winding bars to specification (pro-only).
Winding to spec — same bars, same quarter-turn control, opposite direction.

Winding bars are inserted and the spring is turned in controlled increments until the correct number of turns is reached. Set screws on the winding cone are then tightened to lock the spring in place.

Cable drums are then tightened and the door is tested for balance — when released at mid-travel, a correctly balanced door should stay put. Too heavy means more turns; too light means fewer. Getting this right is what makes the door feel effortless to lift and prevents premature opener wear.

Laser level on tripod used to verify garage door alignment after installation.
After spring/cable setup, pros verify alignment and travel before final sign‑off.

Note: Extension spring systems follow a different routing and hardware layout (pulleys and safety cables). Always follow your door’s specific manual and professional guidance.

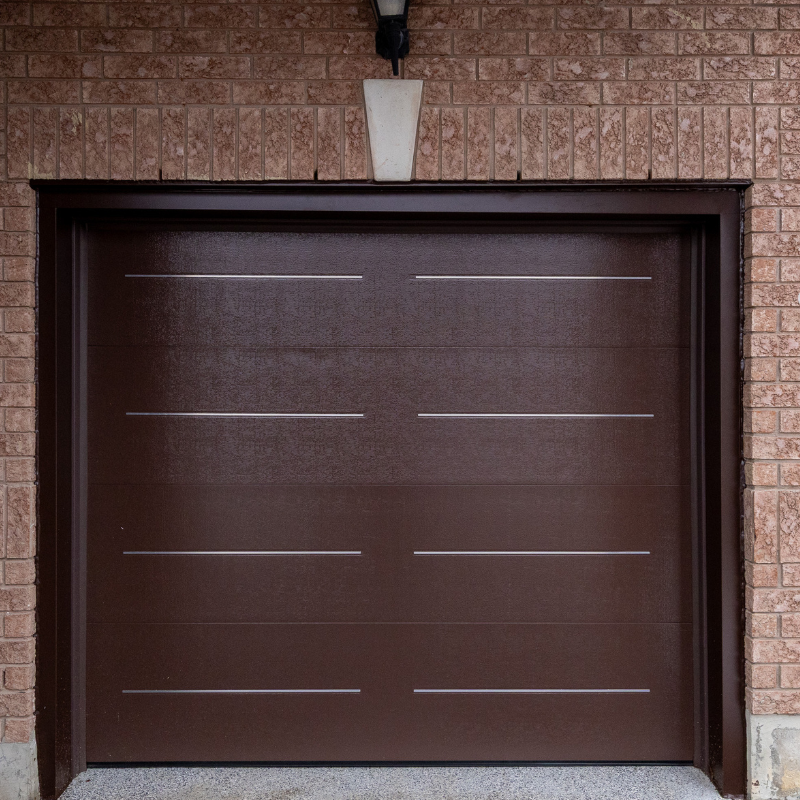
Alignment, balance & final checks

Once the full system is assembled, installers confirm the door runs straight, seals correctly, and stays balanced. A well-balanced door should move smoothly and not feel like “dead weight.”

Pros don’t just eyeball it — a laser level is used to confirm seams are straight, the door sits square in the opening, and travel is smooth from fully closed to fully open. Any binding, uneven gaps, or resistance gets resolved here before the job is signed off.

Installers with a ladder fine-tuning garage door travel and bracket clearances during final setup.
Fine-tuning in progress — bracket clearances and travel speed are dialled in before sign-off.
Using a green laser level to align hinge placement across the garage door during installation.
Laser reference lines confirm hinges and hardware sit perfectly level across the full door width.

Final quality checklist

  • Tracks plumb/level and firmly supported
  • Rollers seated correctly and moving freely
  • Even gaps and smooth travel
  • Cables properly routed and seated (no fraying)
  • Door balance verified (no runaway opening/closing)
  • Opener settings and safety systems verified (if applicable)

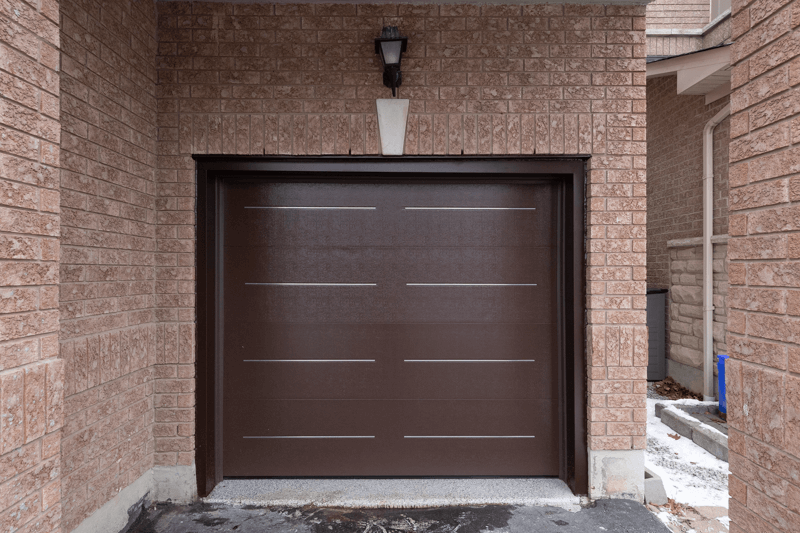
Pro finish: color‑matched aluminum capping (clean frame + protection)

For a truly professional finish, we install color‑matched aluminum capping around the opening. It makes the job look like the whole frame was replaced and helps protect trim from moisture and weathering.

Measuring and prep

Capping starts with precise measurements so every piece fits tight against the brick with no gaps. Backing is installed first to give the capping fasteners a solid, straight substrate.

Measuring the header trim area above the garage opening with a tape measure for aluminum capping.
Accurate measurements come first — this is what makes capping look seamless rather than patched.
Installing wood backing under the header for aluminum capping substrate.
Backing strip installed under the header — gives capping a solid, straight surface to fasten to.

Forming and cutting on-site

Aluminum coil stock is cut and formed on-site using tin snips and a metal brake — this is how the capping fits the exact profile of the opening rather than being a generic trim piece.

Installers measuring the garage door opening exterior trim before installing aluminum capping.
Measure the opening so capping fits cleanly and looks seamless.
Cutting brown aluminum coil stock for garage door frame capping.
Cutting color‑matched aluminum coil stock for the capped finish.
Bending aluminum capping pieces on a metal brake in the work trailer on-site.
Capping is bent to shape on-site using a metal brake — custom fit, not off-the-shelf trim.
Trimming the corner of a brown aluminum capping profile with tin snips.
Detail corners are hand-cut with tin snips so joints sit flush with no gaps.

Installing and sealing

Jamb pieces go in first, then the header is test-fitted, fastened, and the corners sealed. Every seam gets sealant — this keeps moisture out and gives the capping its clean, continuous look.

Installing brown aluminum capping on the side of a garage door opening near brick.
Jamb capping wraps and protects the frame edge for a clean line.
Installers positioning the top header capping piece above the garage door opening.
Header capping completes the “finished frame” look.
Test-fitting the header aluminum capping piece above the garage opening before fastening.
Header test-fit before fastening — checked for straight lines and clean joints against the brick.
Two installers positioning the long header capping piece across the top of the garage door opening.
Header piece held across the full top — two people keep it straight while it’s fastened.
Fastening the header capping trim piece with a drill driver.
Header capping fastened carefully to keep the top edge straight and tight before sealant.
Caulking the inside corner seam of aluminum capping at the header for weather sealing.
Inside corners caulked last — seals any gaps and gives the capped frame a continuous, polished edge.
Applying exterior sealant along the edge of aluminum capping on a garage door frame.
Seal edges for weather protection and a clean final finish.

Final reveal

Finished garage door opening with capped frame, door open, exterior view.
Finished opening with capped frame (door open).
Finished garage door replacement with door closed and capped frame, exterior view.
Finished look (door closed): clean lines, protected frame, pro finish.

Want a safe install (especially spring work) plus a clean, capped finish? Eco Glass Windows & Doors can handle the full garage door replacement.

Disclaimer: This blog is educational and reflects a typical manufacturer-style workflow. Always follow your specific door manufacturer’s instructions and local requirements. If you’re unsure at any stage—especially around springs—hire a professional.

Service area

Primary service area: Vaughan — we also serve:

FAQ

What is included in a complete garage door replacement?
A complete replacement starts with a safe teardown of the old door system, followed by installation of new tracks, panels, rollers/hinges, lift cables, spring system setup (pro-only), alignment checks, and finishing work like sealing and optional aluminum capping.
Why is spring work considered professional-only?
Garage door springs store extreme tension. Incorrect release or adjustment can cause severe injury. Spring work must be done by trained installers using the correct tools and manufacturer specifications.
Why does demolition happen in the opposite order of installation?
Because the spring and cable system must be made safe first. Professionals remove tension, then remove cables and spring components, then take down horizontal tracks and door sections safely.
What is aluminum capping and why add it?
Aluminum capping is color-matched metal trim that wraps the exterior opening. It creates a clean finished-frame look and helps protect the frame from moisture and weather exposure.
What areas do you serve?
Eco Glass Windows & Doors primarily serves Vaughan, and also works in Aurora, Barrie, Bradford West Gwillimbury, Caledon, Cambridge, East Gwillimbury, Georgina, Guelph, King, Kitchener, Milton, Newmarket, North York, Richmond Hill, Waterloo, and Whitchurch-Stouffville.